Want to calculate Azure costs accurately and avoid bill shock? You’re not alone. With Microsoft Azure’s vast array of services, understanding your spending can feel overwhelming—until now.


Why Calculate Azure Costs Accurately?

Understanding how to calculate Azure costs is the first step toward cloud cost optimization. Many organizations underestimate their cloud spend simply because they don’t track usage in real time or lack visibility into resource allocation. Without a clear picture, overspending becomes inevitable.
The Hidden Risks of Ignoring Cloud Costs
When you fail to calculate Azure costs proactively, you risk encountering unexpected charges, budget overruns, and inefficient resource utilization. A 2023 Flexera report found that 32% of cloud spending is wasted due to idle resources, overprovisioning, and lack of governance.
- Unused virtual machines running 24/7
- Orphaned storage accounts with no attached workloads
- Overprovisioned databases consuming higher-tier pricing
These inefficiencies add up quickly. For example, a single unmonitored D4s v3 VM running continuously for a year can cost over $1,200—money that could be saved with proper tracking.
“The biggest challenge in cloud financial management isn’t the technology—it’s the lack of accountability and visibility.” — Gartner, 2023
Business Impact of Poor Cost Management
When teams can’t calculate Azure costs effectively, it leads to strained IT budgets, reduced agility, and slower innovation. Finance and DevOps teams often operate in silos, making it difficult to align cloud usage with business goals. This disconnect results in delayed cost recovery, inaccurate forecasting, and poor ROI on cloud investments.
Moreover, without granular cost data, it’s nearly impossible to justify cloud spending to stakeholders or optimize for peak performance during critical business periods.
How to Calculate Azure Costs: Key Components
To calculate Azure costs accurately, you must understand the building blocks of Azure pricing. Microsoft uses a consumption-based model, meaning you pay only for what you use. However, the complexity arises from the sheer number of services, pricing tiers, and regional variations.
Compute: The Largest Cost Driver
Compute resources—like Virtual Machines (VMs), Azure Kubernetes Service (AKS), and App Services—are typically the biggest contributors to your Azure bill. To calculate Azure costs for compute, consider:
- VM size and family (e.g., B-series for burstable, D-series for general purpose)
- Instance count and uptime (per hour or second)
- Operating system (Windows vs. Linux pricing differs)
- Reserved Instances (RIs) or Spot Instances for discounts
For example, a Standard_D2s_v3 VM in East US costs approximately $0.136/hour on-demand. Running it 24/7 for a month would cost ~$98. If you reserve it for one year with no upfront payment, you can save up to 40%, reducing the cost to ~$59/month.
Tools like the Azure Pricing Calculator allow you to model these scenarios before deployment.
Storage: Don’t Overlook Data Costs
Storage might seem inexpensive at first glance, but costs escalate with volume, redundancy, and access frequency. Azure offers several storage tiers:
- Hot (frequent access)
- Cool (infrequent access)
- Archive (rare access, lowest cost)
To calculate Azure costs for storage, you need to factor in:
- Amount of data stored (GB/TB)
- Redundancy type (LRS, ZRS, GRS)
- Data transfer (ingress is free, egress is charged)
- Operations (read/write transactions)
For instance, storing 1 TB of data in Hot LRS in East US costs ~$20/month. The same data in Archive tier drops to ~$1.50/month—but retrieval incurs additional fees and latency.
Using lifecycle policies to automatically move data between tiers can significantly reduce long-term costs.
Networking and Data Transfer
Networking costs are often underestimated when you calculate Azure costs. While inbound data transfer is free, outbound (egress) traffic is charged based on volume and destination.
- Egress to the internet: tiered pricing (first 10 TB at lower rates)
- Cross-region replication: higher costs for data moved between Azure regions
- Bandwidth usage for ExpressRoute or Load Balancers
For example, transferring 5 TB of data from East US to the internet costs ~$275. However, transferring the same data to another Azure region (e.g., West US) costs ~$125. Planning data residency and access patterns can help minimize these charges.
Microsoft provides a detailed bandwidth pricing page to help estimate these costs.
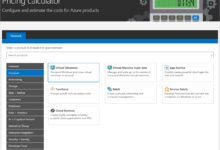
Use Azure Pricing Calculator to Forecast Costs
One of the most effective ways to calculate Azure costs before deployment is using the Azure Pricing Calculator. This free tool allows you to build a custom environment and estimate monthly costs with high accuracy.
Step-by-Step Guide to Using the Calculator
Follow these steps to calculate Azure costs using the official tool:
- Visit Azure Pricing Calculator
- Select services you plan to use (e.g., Virtual Machines, Blob Storage, SQL Database)
- Configure specifications (region, instance size, storage type)
- Adjust usage duration (hours per day, days per month)
- Apply reserved instance discounts if applicable
- Export or save the estimate for sharing
The calculator supports over 100 Azure services and allows you to compare scenarios side by side. For example, you can compare the cost of running 10 VMs on-demand vs. with a 3-year reservation.
Advanced Tips for Accurate Forecasting
To get the most out of the Azure Pricing Calculator:
- Use real-world usage patterns (e.g., 8 hours/day vs. 24/7)
- Include data transfer estimates based on user traffic
- Add monitoring and backup services (often forgotten)
- Factor in support plans (Basic vs. Professional Direct)
You can also integrate the calculator with Azure Cost Management for ongoing tracking after deployment.
“Forecasting isn’t about predicting the future—it’s about preparing for multiple possibilities.” — Microsoft Azure Documentation
Leverage Azure Cost Management + Billing
Once your resources are live, you need tools to monitor and analyze actual spending. Azure Cost Management + Billing is a built-in service that helps you calculate Azure costs in real time and identify optimization opportunities.
Key Features of Cost Management
Azure Cost Management provides:
- Cost analysis dashboards with filtering by service, region, or tag
- Budget creation with alert thresholds (e.g., notify at 80% of budget)
- Forecasting based on historical usage
- Export capabilities for CSV or Power BI integration
By tagging resources (e.g., by department, project, or environment), you can break down costs and assign accountability. For example, tagging all Dev resources with env=dev allows you to filter and analyze only non-production spending.
Setting Up Budgets and Alerts
To prevent overspending, set up budgets in Azure Cost Management:
- Navigate to Cost Management + Billing in the Azure portal
- Select Budgets and click Add
- Define scope (subscription, resource group, or management group)
- Set budget amount and time period (monthly, quarterly)
- Configure alerts at 50%, 75%, and 100% of budget
- Assign email recipients (e.g., finance team, DevOps leads)
These alerts act as early warning systems, allowing teams to scale down or terminate unused resources before costs spiral.
Analyze Costs with Azure Advisor Recommendations
Azure Advisor is a personalized cloud consultant that analyzes your usage patterns and provides actionable recommendations to optimize cost, performance, security, and reliability.
How Azure Advisor Identifies Cost Savings
Azure Advisor continuously scans your environment and flags opportunities such as:
- Underutilized VMs (CPU usage < 5% for 4+ days)
- Idle load balancers or public IPs
- Unattached disks or snapshots
- Recommendations to switch to Reserved Instances
For example, if a VM is running at 3% CPU utilization for over a week, Advisor may suggest resizing it to a smaller instance (e.g., from D4s to B2s), potentially saving 60% on compute costs.
These recommendations are backed by real usage data and can be implemented directly from the portal.
Implementing Advisor’s Cost Optimization Tips
To act on Azure Advisor recommendations:
- Go to Azure Advisor in the portal
- Select the Cost tab
- Review high-impact recommendations (labeled “High” or “Very High”)
- Click on a recommendation to see affected resources
- Use the “Fix” button to apply changes (e.g., resize VM)
While some fixes require manual intervention, others can be automated using Azure Policy or scripts.
calculate azure costs – Calculate azure costs menjadi aspek penting yang dibahas di sini.
“Azure Advisor can help reduce cloud costs by up to 30% with minimal effort.” — Microsoft Case Study, 2022
Optimize with Reserved Instances and Savings Plans
If you want to calculate Azure costs with long-term savings in mind, Reserved Instances (RIs) and Savings Plans are essential tools. They offer significant discounts—up to 72%—for committing to 1 or 3 years of usage.
Understanding Reserved Instances (RIs)
Reserved Instances apply to specific services like Virtual Machines, SQL Database, and Cosmos DB. When you purchase an RI, you commit to using a particular VM size in a region for a set period.
- 1-year reservation: ~35-40% discount
- 3-year reservation: ~60-72% discount
- Payment options: No upfront, partial upfront, or full upfront
To calculate Azure costs with RIs, use the Reserved VM Instances page to compare on-demand vs. reserved pricing.
For example, a Standard_D4s_v3 VM costs $0.272/hour on-demand (~$196/month). With a 1-year no-upfront reservation, the hourly rate drops to $0.163 (~$117/month), saving $79/month.
Savings Plans: Flexible Commitment Model
Introduced in 2021, Azure Savings Plans offer a more flexible alternative to RIs. Instead of reserving specific VMs, you commit to a fixed hourly spend (e.g., $0.50/hour) across compute services.
Benefits include:
- Applies to VMs, AKS, Functions, and more
- Discounts up to 65% with 1- or 3-year terms
- Automatic discount application across eligible usage
- Can change VM sizes or families without losing savings
Savings Plans are ideal for dynamic environments where workloads change frequently.
Monitor and Report with Azure Cost Analysis
To truly master how to calculate Azure costs, you need ongoing monitoring. Azure Cost Analysis is a powerful tool within Cost Management that provides deep insights into spending trends and anomalies.
Creating Custom Cost Reports
With Azure Cost Analysis, you can create custom reports by:
- Filtering by service (e.g., only Virtual Machines)
- Grouping by resource group, tag, or location
- Using time ranges (last 7 days, month-to-date, custom)
- Applying filters for specific SKUs or cost centers
For example, you can generate a report showing all storage costs grouped by department using the department=finance tag. This helps allocate costs accurately for chargeback or showback models.
Identifying Cost Anomalies
Azure Cost Analysis includes anomaly detection that alerts you to unexpected spikes in spending. For instance, if your egress costs suddenly double due to a misconfigured CDN, the system will flag it and provide context.
To investigate anomalies:
- Open Cost Analysis in the Azure portal
- Enable anomaly detection (if not already on)
- Review flagged anomalies with date, service, and cost delta
- Drill down into the resource causing the spike
This proactive monitoring helps prevent minor issues from becoming major overruns.
Best Practices to Reduce Azure Spending
Knowing how to calculate Azure costs is only half the battle. The real value comes from applying best practices to reduce spending without sacrificing performance.
Implement Resource Tagging Strategy
Tagging is the foundation of cost accountability. Apply consistent tags like:
owner=team-devopsproject=customer-portalenv=productioncost-center=marketing
These tags allow you to filter and report on costs by business unit, project, or environment. Without tagging, cost allocation becomes guesswork.
Schedule Non-Production Resources
Development and testing environments don’t need to run 24/7. Use Azure Automation or DevTest Labs to shut down VMs outside business hours.
For example, shutting down 5 dev VMs from 6 PM to 8 AM on weekdays saves 60% of compute costs. Over a year, that’s thousands in savings.
You can use Azure Functions with Timer Triggers to automate start/stop schedules.
Use Right-Sized Instances
Overprovisioning is a common cause of waste. Use Azure Monitor to collect CPU, memory, and disk usage data, then resize VMs accordingly.
For example, a VM running at 15% CPU average can likely be downsized from a D4s to a D2s, cutting costs in half. Azure Advisor also recommends right-sizing based on historical data.
How do I calculate Azure costs for a multi-region deployment?
To calculate Azure costs for a multi-region deployment, use the Azure Pricing Calculator and add services for each region separately. Remember that compute, storage, and egress costs vary by region. Also, factor in cross-region data transfer fees, which can be significant. Use tags and cost analysis to track spending per region.
Can I automate cost reporting in Azure?
Yes, you can automate cost reporting using Azure Cost Management’s export feature. Set up scheduled exports to a storage account or Power BI dashboard. You can also use Azure Logic Apps or PowerShell scripts to generate and email monthly reports automatically.
What is the difference between Azure Pricing Calculator and TCO Calculator?
The Azure Pricing Calculator helps you estimate cloud service costs based on usage. The TCO Calculator compares the total cost of ownership between on-premises infrastructure and Azure, including hardware, maintenance, and operational expenses.
How accurate is the Azure Pricing Calculator?
The Azure Pricing Calculator is highly accurate for standard configurations. However, it doesn’t account for all variables like network latency, third-party software licensing, or unexpected traffic spikes. Always monitor actual usage with Cost Management after deployment.
Are there third-party tools to calculate Azure costs?
Yes, third-party tools like CloudHealth by VMware, Azurelytics, and Apptio offer advanced cost management features. They provide multi-cloud support, showback/chargeback models, and AI-driven optimization. However, Azure’s native tools are sufficient for most organizations.
Calculating Azure costs doesn’t have to be complex. By leveraging tools like the Azure Pricing Calculator, Cost Management, and Advisor, you gain full visibility into your spending. Combine this with best practices—like tagging, reservations, and automation—and you can reduce costs by 30-50%. The key is to move from reactive billing to proactive cost governance. Start today, and turn your Azure investment into a strategic advantage.
calculate azure costs – Calculate azure costs menjadi aspek penting yang dibahas di sini.
Recommended for you 👇
Further Reading: